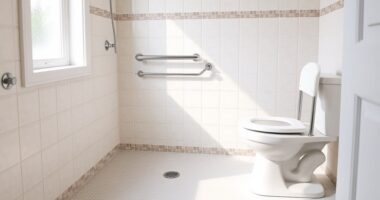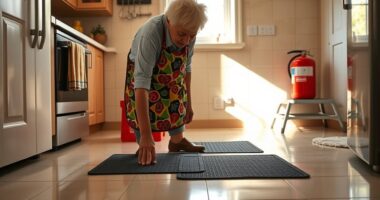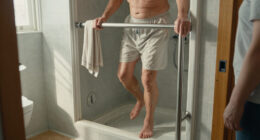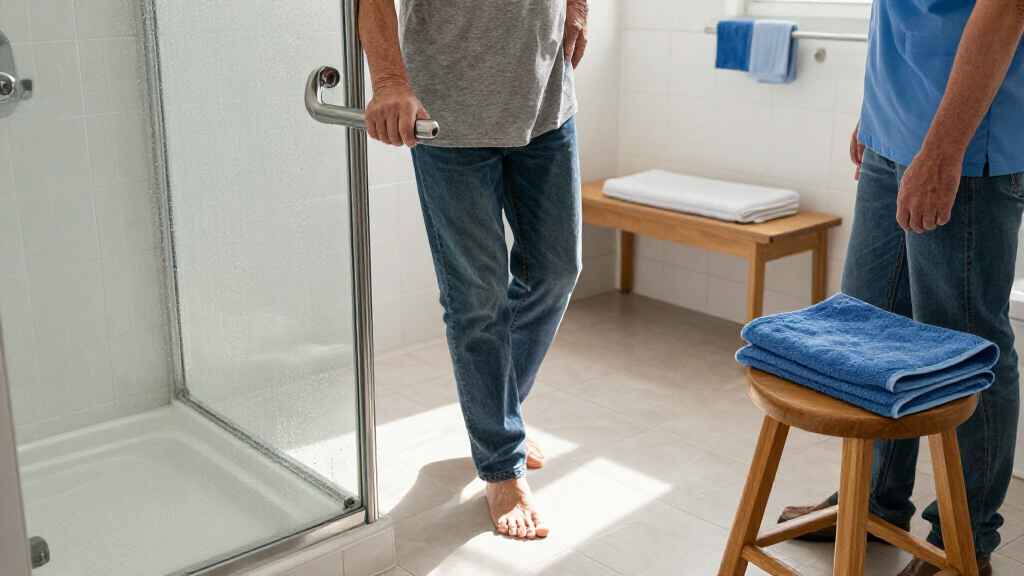
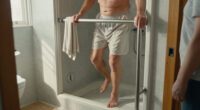
Install grab bars at the points where a person needs support to sit, stand, step, or turn in a bathroom. This guide is for homeowners and caregivers with basic measuring and drilling skills; it explains how to choose locations, attach bars to suitable structural support, and check the finished installation. Allow 2–4 hours for planning and installation, plus any curing time specified for sealant or adhesive. If the wall construction, plumbing location, or user’s support needs are unclear, consult a qualified installer before drilling.

Turn quiet afternoons into listening time
- Thousands of audiobooks, podcasts and originals
- Listen on your phone, tablet or Echo — also offline
- Cancel anytime

Shower Grab Bars, 16-Inch Handles, 2-Pack, Polished Nickel
- ✔ Brand: Ravinte Hardware
- ✔ Material: Stainless steel
- ✔ Finish: Polished nickel

Stander Single Handle Non-Rotating Floor-to-Ceiling Grab Bar, No-Drill Tension-Mounted Transfer Pole, White
- ✔ Brand: Stander
- ✔ Model: 8140
- ✔ Material: Powder-coated steel

Gotega 16-Inch Anti-Slip Shower Grab Bars – 2 Pack for Seniors and Handicapped
- ✔ Brand: Gotega
- ✔ Model: AntiSlip grab
- ✔ Material: Stainless steel
Difficulty: Intermediate | Time: 2–4 hours, plus time for adhesive or sealant to cure
What You’ll Need
Tools & Materials:
- Grab bars rated for the intended use and compatible mounting hardware
- Stud finder suitable for the wall type, or tools for confirming masonry support
- Tape measure, pencil, and level
- Drill and bits matched to the wall and fasteners
- Screwdriver or driver bit
- Safety glasses
- Bathroom-safe sealant if required by the installation instructions
Knowledge:
- Basic measuring, leveling, and drilling
- Ability to identify the wall type and follow the grab bar manufacturer’s mounting instructions
Ask the person who will use the bars where support is needed, and follow any advice from an occupational therapist or other care professional. Check the bar’s load rating, fastener requirements, and instructions before buying or drilling. A towel bar, suction-cup handle, or decorative rail is not a substitute for a load-rated grab bar attached as specified.
Shower Grab Bars, 16-Inch Handles, 2-Pack, Polished Nickel
For a buyer who wants dependable handholds at fixed points in a shower or bath area, the Ravinte two-pack makes the clearest all-around case. Two bars let us plan support at separate points, such as near entry and beside a standing area, while the listed length options range from 12 to 36 inches. That flexibility gives it an edge over the Gotega pair if we need to adapt bar length to the available wall space. Its knurled stainless steel grip is intended to help when hands are wet, and the polished nickel finish can blend into a more traditional bathroom.The tradeoff is installation: these are not movable supports. We need an appropriate wall structure and careful mounting, and the listed 500-pound capacity should not be treated as a promise that any wall can bear that load. Compared with the Stander pole, Ravinte is better suited to a fixed shower handhold but cannot be repositioned without new mounting. The one-inch diameter is the only stated size, so buyers who need a different grip thickness should look elsewhere. Polished metal can also show water spots.
Pros:
- Two bars provide support at separate planned locations.
- Knurled stainless steel surface is designed for a more secure wet grip.
- Multiple listed lengths help fit different wall spaces.
- Rust-resistant stainless steel with a polished nickel finish.
Cons:
- Requires drilling and secure wall mounting.
- Only a one-inch diameter is listed.
- Polished finish may show water spots.
Best for: People who want two fixed, wet-area handholds and can arrange secure wall mounting.
Not ideal for: Renters or anyone who cannot confirm suitable mounting points, or buyers who need a movable support pole.
Bottom line: We’d choose Ravinte for a flexible pair of fixed shower handholds when the wall can be mounted securely.
“We’d choose Ravinte for a flexible pair of fixed shower handholds when the wall can be mounted securely.”
Stander Single Handle Non-Rotating Floor-to-Ceiling Grab Bar, No-Drill Tension-Mounted Transfer Pole, White
When fall risk centers on getting upright beside a bed, chair, or toilet, the Stander tension-mounted pole addresses a different need from the two shower-bar pairs. Its floor-to-ceiling design and two-level handle offer a support point without drilling into a wall. This makes it the most adaptable choice for a room where a fixed grab bar is not practical, and the non-rotating handle is intended to stay oriented as a steady handhold. Unlike Ravinte and Gotega, it can move between suitable indoor locations.That flexibility comes with strict fit limits. The pole is specified for ceilings from 7 feet to 9 feet 6 inches and is not compatible with vaulted ceilings. It also cannot be used inside a bathtub or shower, so it is not a substitute for a wet-area bar. Its listed capacity is 300 pounds, lower than the 500-pound claims for each wall-mounted bar. Buyers should treat tension mounting as dependent on a suitable floor and ceiling, not as a universal no-install solution. Choose it for standing assistance in an appropriate room; skip it if the main problem is maintaining balance while bathing.
Pros:
- No-drill tension mounting avoids wall drilling.
- Can be placed in suitable bathroom, bedroom, or living areas.
- Two-level handle offers more than one hand position.
- Non-rotating handle is designed to provide a steady support point.
Cons:
- Cannot be used inside tubs or showers.
- Not compatible with vaulted ceilings; height range is limited.
- Listed capacity is 300 pounds, below the wall-bar claims.
Best for: People who need a nearby standing or transfer handhold in a bedroom or living area and have compatible flat ceiling height.
Not ideal for: Anyone seeking a grab bar inside a tub or shower, or with a vaulted ceiling or incompatible ceiling height.
Bottom line: We’d pick Stander for room-based standing assistance when its ceiling requirements are met, not for shower safety.
“We’d pick Stander for room-based standing assistance when its ceiling requirements are met, not for shower safety.”
Gotega 16-Inch Anti-Slip Shower Grab Bars – 2 Pack for Seniors and Handicapped
The Gotega two-pack is the closest alternative to Ravinte for buyers who want fixed bars in a wet area, but it differentiates itself with a silicone anti-slip strip shaped to meet the fingers. That tactile feature may appeal to someone who wants more than a knurled metal surface when gripping with wet hands. Both bars are listed at 16 inches and the pair is described as stainless steel with a brushed finish, making this a more specific fit than Ravinte’s range of length options. Concealed screws are intended to keep the installed look tidy.In fall-prevention terms, the important similarity is that Gotega still depends on secure wall mounting; its grip detail does not remove the need to locate appropriate mounting points. The listing says each bar supports up to 500 pounds, but a capacity claim is not a substitute for suitable wall structure and installation. Compared with Ravinte, Gotega offers a more finger-oriented grip surface but less choice in length. Compared with Stander, it works as a fixed wet-area support, not a movable transfer aid. Buyers should skip it if they cannot drill or need a bar with a different length.
Pros:
- Silicone anti-slip strip is designed to support wet-hand grip.
- Two 16-inch bars provide more than one fixed support point.
- Brushed stainless steel construction is listed as waterproof.
- Concealed screws support a less exposed installed appearance.
Cons:
- Wall drilling and suitable mounting points are required.
- Only 16-inch bars are listed.
- The grip feature does not make the bars a full body-weight harness.
Best for: Buyers who want a pair of 16-inch fixed bars and prefer a silicone strip under the fingers for wet-hand grip.
Not ideal for: People who need variable bar lengths, cannot drill into suitable wall structure, or need a room-to-room transfer pole.
Bottom line: We’d choose Gotega over Ravinte when its silicone finger strip is the deciding grip preference and 16 inches fits the wall.
“We’d choose Gotega over Ravinte when its silicone finger strip is the deciding grip preference and 16 inches fits the wall.”
As an Amazon Associate we earn from qualifying purchases.
Before You Start
Keep the bathroom dry and clear of loose rugs or obstacles while working. Before drilling, check both sides of the wall and use an appropriate detector to locate pipes, wiring, and other hidden services. Do not drill where their location is uncertain. If you cannot confirm a secure mounting surface, pause and arrange an assessment by a qualified installer. Use a helper when positioning a long bar or working near a tub or shower.
Step-by-Step Instructions
Step 1: Identify the support points
Watch the intended user move through the bathroom, or ask them to describe where they feel unsteady. Mark the points where they need help sitting down, standing up, stepping over a tub edge, or turning. Consider the route from the doorway to the toilet, bath, or shower, and note where a stable handhold would be reachable without stretching or twisting.
Tip:Place the user’s comfort and movement pattern ahead of a standard layout. A care professional can help identify positions and bar styles for specific mobility needs.
Check: You have a short list of support points and know which movements each proposed bar should assist.
Step 2: Choose the bar type and position
Select a grab bar designed and rated for body-weight support, with a grip diameter and surface the user can hold comfortably. Choose a length that gives a useful handhold throughout the movement. Hold a paper template or the bar itself at each planned location, then ask the user to test the reach and hand position without putting their weight on it. Mark the proposed mounting points and check the bar will not block doors, controls, or transfers.
Tip:Horizontal, vertical, or angled bars serve different movements. Follow professional guidance when available; do not assume one direction suits every user.
Check: The user can reach each planned bar from a stable position, and the bar’s shape and placement suit the movement it supports.
Step 3: Confirm the wall and mounting support
Determine whether each bar will mount to wood framing, masonry, or another wall system. Use a stud finder and confirm likely stud centers with careful measurement or an appropriate small pilot hole where safe. For tile, locate the structural support behind it; tile alone is not a secure anchor. Use only fasteners and mounting methods approved for the wall material and the bar. If the bar’s mounting holes do not align with suitable support, choose a different position or use a professionally specified mounting solution.
Tip:Do not rely on ordinary drywall anchors for a grab bar unless the bar manufacturer explicitly specifies a tested system for that wall and use.
Check: You can identify the support behind every mounting point and have compatible fasteners for that surface.
Scan the drilling area with a detector appropriate to the wall and check the opposite side of the wall for plumbing fixtures, outlets, or switches. Compare the planned holes with known pipe and wire routes. If the detector gives an uncertain reading or a hole could intersect a service, stop and get the location checked before proceeding.
Tip:Bathrooms often have water lines near showers, baths, and sinks. A detector reduces risk but may not identify every service in every wall.
Check: Each planned hole is clear of known services, and no unresolved detector warning remains.
Step 5: Mark and drill the mounting holes
Hold the bar or its template in the final position. Use a level to align it as intended, mark every hole, and check the marks against the confirmed support locations. Put on safety glasses. Drill with the bit and method specified for the wall and fasteners; for tile, use a tile-appropriate bit and avoid hammer action until through the tile if the instructions call for it. Keep the drill controlled and stop if you encounter unexpected resistance or a service warning.
Tip:Use the specified hole size and depth. Oversized or misplaced holes can weaken the attachment or prevent the fastener from gripping.
Check: The holes are clean, correctly positioned, and enter the intended structural support without visible wall damage.
Step 6: Attach the grab bar
Place the bar over the holes and install the specified fasteners. Tighten them evenly with the appropriate driver, following the manufacturer’s instructions. Do not overtighten, strip the screw heads, or substitute shorter screws. If the installation passes through tile or a wet-area surface, apply the required sealant as directed to protect against water entry. Keep the bar unloaded while sealant or adhesive cures for the full time stated by its manufacturer.
Tip:Some bars require a particular screw type, washer, backing plate, or sealing method. Use the supplied instructions for that exact model.
Check: The bar sits firmly against its mounting surface, all fasteners are seated as specified, and any required sealant is in place.
Step 7: Check stability and practice safe use
Inspect the wall around the mounts for cracks, movement, gaps, or damaged tile. When any sealant has cured, test the bar by gripping it and applying gradual pressure in the directions the user will use it. Do not jerk, bounce, or hang full body weight on it as a test. Have the user practice the supported movement while a helper stays close, and adjust the setup if the reach or approach feels awkward.
Tip:A bar that shifts, creaks, pulls away, or damages the wall is not ready for use. Stop using it and have the mounting assessed.
Check: The bar stays firmly in place during a gradual hand-pressure check, and the user can reach and use it without losing balance.
Common Mistakes to Avoid
- Mounting a bar to tile or drywall without secure structural support. — Confirm the material behind the finish and use a mounting system specified for that support and bar.
- Placing the bar where the user cannot reach it comfortably during the movement. — Mock up the position and have the user check reach before drilling; seek professional input when mobility needs are complex.
- Using a towel rail, suction handle, or decorative bar for body-weight support. — Choose a load-rated grab bar and install it with the specified hardware and method.
- Drilling before checking for pipes and wiring. — Inspect both sides of the wall, use a suitable detector, and stop if the route remains uncertain.
Troubleshooting
Problem: The mounting holes miss the studs or other confirmed support.
Solution: Do not rely on weak anchors or force the bar into place. Reposition the bar if that still meets the user’s reach needs, or ask a qualified installer to specify a secure mounting solution.
Problem: The drill encounters unexpected resistance, a hollow space, or a warning from the detector.
Solution: Stop drilling and leave the hole untouched until you identify what is behind the surface. Have a qualified professional check for services or unsuitable wall construction.
Problem: The bar shifts or the wall cracks during the pressure check.
Solution: Keep the bar out of use. Remove or secure it only if you can do so safely, then have the wall, fasteners, and installation method assessed and corrected.
Problem: Water appears around a fastener after installation.
Solution: Stop using the bar if the mounting may be affected. Dry the area, check the sealant instructions, and have the seal repaired; investigate promptly if moisture has reached the wall cavity.
What Success Looks Like
The completed installation has load-rated bars at reachable support points, with every mount attached using hardware suitable for the verified wall structure. The bars do not move during a gradual pressure check, the surrounding wall remains intact, and the intended user can grasp them during the relevant movement. Any required sealant has cured before use. Grab bars reduce risk but do not remove every fall hazard; keep floors dry and maintain clear paths.
Next Steps
Show the user how to grasp each bar before sitting, standing, or stepping, and stay nearby during early practice if needed. Check the bars and surrounding wall periodically for looseness, corrosion, cracks, or water damage, and stop using any bar that moves. Reassess placement if the user’s mobility changes, the bathroom layout changes, or the bar no longer feels comfortable to reach.
Frequently Asked Questions
Can I install a grab bar on a tiled wall?
Yes, when the bar is fastened through the tile into suitable structural support using the specified method. Tile by itself is not a secure anchor. Use the correct tile bit and avoid damaging the finish.
Are suction-cup grab bars safe for fall prevention?
Do not treat suction-cup handles as permanent body-weight support unless the product is specifically rated and approved for that use. Many are intended as positioning aids, and suction can fail without warning. Follow the product’s instructions and use a permanently mounted, properly supported bar for weight-bearing assistance.
How high should a grab bar be?
There is no single height that fits every person or movement. Place the bar so the user can reach it comfortably from the position where support is needed, and follow applicable building requirements and professional guidance.
How do I know if the bar is secure?
Confirm that the fasteners enter the specified structural support, inspect the wall, and apply gradual hand pressure in the directions of use. The bar should not shift, creak, or pull away. A simple hand check does not replace correct installation.
Cold & flu season Picks
humidifiers
As an affiliate, we earn on qualifying purchases.