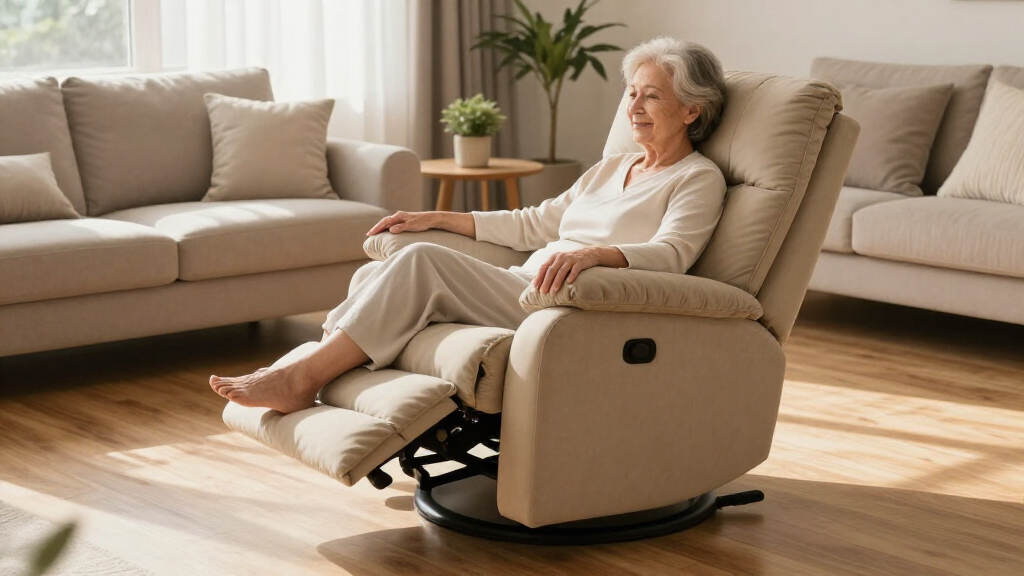
This guide helps seniors, family members, and caregivers choose an ergonomic recliner that supports comfortable sitting, reclining, and standing. You will measure the user and room, select a suitable mechanism, test the chair’s fit, check safety features, and prepare the final location. The process is beginner-friendly and usually takes one to three hours before delivery. Do not choose from appearance or softness alone: a chair can feel pleasant for several minutes while still placing the legs, back, neck, or shoulders in a poor position.

Get comfort and care essentials delivered free — and shop member deals
- Fast, free delivery on millions of items
- Access to Prime Big Deal Days deals on October 6–7
- Prime Video, Amazon Music and more included

MAHOMICO Power Lift Recliner Chair for Elderly with Vibration Massage and Lumbar Heating
- ✔ Material: Metal frame, sponge padding, soft fabric
- ✔ Seat Width: 23.62 inches
- ✔ Maximum Weight: 350 pounds

MCombo Power Lift Recliner for Elderly, Fabric 7287 (Dark Gray, Medium)
- ✔ Reclining angle: 140°
- ✔ Extended footrest: 4.7 inches
- ✔ Recommended height: 5’1"-5’9"
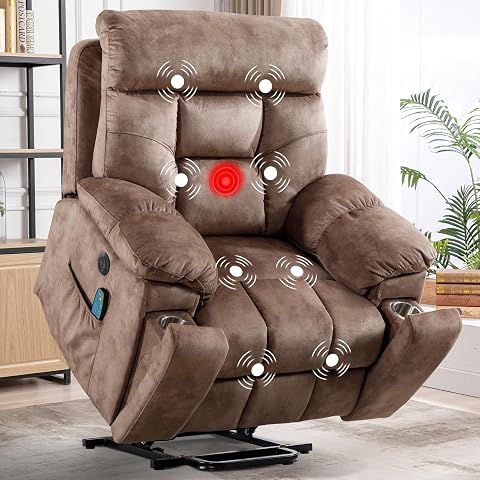
CANMOV Large Power Lift Recliner Chair with Massage and Heat for Elderly Big and Tall People, Camel
- ✔ Extended Backrest Length: 30 inches
- ✔ Seat Width: 21 inches
- ✔ Massage Modes: 5
Difficulty: Beginner | Time: 1–3 hours for measuring and testing, plus delivery and setup time
What You’ll Need
Tools & Materials:
- Tape measure
- Notebook or phone for recording measurements
- The senior’s usual footwear
- A helper if balance or mobility is limited
- A list of current pain, mobility, and daily-use needs
Knowledge:
- The senior’s approximate height and weight
- Any standing, balance, circulation, joint, or back limitations
- The room location and available electrical outlets
Plan to test chairs when the senior is rested and wearing the shoes normally used at home. Bring any walking aid that is part of the usual sitting and standing routine. If the chair is being selected after surgery, a fall, or a major change in mobility, ask a clinician or occupational therapist whether a lift mechanism, seat height, or reclining position requires special guidance.
MAHOMICO Power Lift Recliner Chair for Elderly with Vibration Massage and Lumbar Heating
<p>This recliner stands out for its comprehensive comfort features, including vibration massage and lumbar heating, making it ideal for seniors seeking relaxation. Its adjustable recline up to 135° and spacious seat support various body types, while the built-in cup holders, side pockets, and USB port add convenience. Compared to simpler models, it offers more sensory benefits, but the added features require assembly and may limit color choices. Some users report that the massage function isn’t as strong as expected, but overall, this chair provides a luxurious experience for those prioritizing relaxation and support.</p>
Pros:
- Includes vibration massage and lumbar heating for enhanced comfort
- Supports various body types with a spacious, supportive seat
- Built-in cup holders, side pockets, and USB port for added convenience
- Effortless power lift function for easier standing
Cons:
- Requires assembly, which may be challenging for some
- Customer reviews indicate the massage may be less effective than expected
- Limited color options restrict customization
Best for: Seniors who prioritize comfort, massage, and heating features for relaxation and recovery.
Not ideal for: Users seeking a simple, no-frills recliner or those on a tight budget due to its higher price point and assembly requirements.
Bottom line: A feature-rich recliner perfect for seniors seeking maximum comfort and support, despite assembly and color limitations.
“A feature-rich recliner perfect for seniors seeking maximum comfort and support, despite assembly and color limitations.”
MCombo Power Lift Recliner for Elderly, Fabric 7287 (Dark Gray, Medium)
<p>This model is tailored for seniors who need basic assistive support without extra features. Its smooth lift mechanism helps with standing, and the recline extends up to 140°, making it easier to find a comfortable position. The soft, easy-to-clean fabric and built-in storage pockets enhance practicality. Compared to the first choice, it lacks massage and heating, but it excels in straightforward functionality. Assembly is quick, taking about 15 minutes, though some users might find it challenging if they have limited mobility or strength. It’s best suited for users within the recommended height range of 5’1" to 5’9".</p>
Pros:
- Assists with easy standing and reclining
- Includes convenient storage and charging ports
- Soft, skin-friendly, easy-to-clean fabric
Cons:
- No massage or heat functions
- Assembly could be difficult for some users
- Limited to specific height range for optimal use
Best for: Seniors who need reliable standing assistance and simple recline control with minimal fuss.
Not ideal for: Those seeking massage, heat, or luxury features, or seniors outside the specified height range.
Bottom line: A straightforward, reliable recliner ideal for seniors needing basic mobility support and ease of use.
“A straightforward, reliable recliner ideal for seniors needing basic mobility support and ease of use.”
CANMOV Large Power Lift Recliner Chair with Massage and Heat for Elderly Big and Tall People, Camel
<p>This recliner is designed for larger body types, featuring an overstuffed, wide seat and extended backrest, making it ideal for big and tall seniors. It offers adjustable reclining, plus massage and heat functions to soothe tired muscles. Compared to the other options, it’s more spacious and supportive but may be less suitable for smaller spaces due to its bulk. Easy to operate with a remote control, it comes with side pockets, cup holders, and a USB port, combining comfort with functionality. The need for a power outlet and its size are the main tradeoffs, making it best in larger rooms or for those who prioritize muscle relief and space.</p>
Pros:
- Wide, comfortable design suitable for big and tall users
- Includes massage and heat functions for muscle relief
- Easy to operate with remote control and simple assembly
Cons:
- May be bulky for smaller rooms
- Limited color options
- Requires power source for massage and heat functions
Best for: Big and tall seniors seeking a spacious, supportive recliner with massage and heat features.
Not ideal for: Smaller spaces or seniors with limited mobility needing a lightweight, compact chair.
Bottom line: A spacious, feature-rich recliner tailored for larger users needing support and relaxation, with some space considerations.
“A spacious, feature-rich recliner tailored for larger users needing support and relaxation, with some space considerations.”
As an Amazon Associate we earn from qualifying purchases.
Before You Start
Do not rely only on advertised labels such as orthopedic, ergonomic, or senior-friendly. Fit depends on the individual user. A seat that is too high leaves the feet unsupported, while a low or deep seat can make standing harder. Confirm the manufacturer’s weight limit, required wall clearance, fully reclined dimensions, and delivery route before paying. A power recliner also needs a safe outlet location and enough space to keep its cord away from walking paths.
Step-by-Step Instructions
Step 1: Measure the user and available space
Measure the doorway, hall, turning area, and final chair location. Record the maximum chair width, upright depth, reclined depth, and distance from the wall. For the user, measure from the floor to the back of the knee while wearing normal shoes, across the widest part of the hips, and from the back of the hips to the knee crease. Use these figures as a screening tool, then confirm the fit by sitting in the actual chair.
Tip: Allow extra delivery clearance for packaging, removable backs, stair rails, and tight corners.
Check: You have written measurements for the user, doorway, route, chair location, and full reclining area.
Step 2: Choose the right reclining mechanism
Select a manual recliner only when the senior can reach and operate its handle without twisting or force. Choose a power model when push-button adjustment would be easier. A dual-motor chair can move the backrest and footrest separately, which gives more positioning choices. Choose a lift recliner when standing from a normal seat is difficult and a clinician has not advised against it.
Tip: A lift chair assists standing but does not replace safe transfer technique, balance support, or a suitable walking aid.
Check: The controls match the user’s hand strength, reach, coordination, and sit-to-stand needs.
Step 3: Check the seated body position
Ask the senior to sit fully back with both feet on the floor. Check that the knees rest near a right angle, the thighs feel supported without pressure behind the knees, and the hips have a small amount of side clearance. The seat should not force the knees upward or leave the legs hanging. The lower back should meet the lumbar support without requiring the user to slide forward.
Tip: Do not plan to correct a badly sized seat with loose cushions; they can alter seat depth, raise the user too far, or slide during standing.
Check: The feet rest flat, the knees are comfortable, the back is supported, and the user can sit without leaning to one side.
Step 4: Test the backrest, headrest, and footrest
Recline the chair through every available position. Check that the headrest supports the head without pushing the chin toward the chest. The backrest should follow the spine and support the lower back. Extend the footrest and check where its edge meets the legs; it should support the calves without pressing sharply behind the heels, ankles, or knees. Ask about numbness, pulling, or concentrated pressure.
Tip: Stop the test if reclining causes dizziness, shortness of breath, new pain, or difficulty returning upright.
Check: The senior remains supported and comfortable in upright, reading, resting, and fully reclined positions.
Step 5: Practice the complete daily routine
Have the senior sit, adjust the chair, recline, return upright, and stand at least three times. Place the usual walking aid nearby and repeat the sequence as it would happen at home. Test the chair for at least 15 minutes rather than judging it after a brief sit. Check whether controls remain easy to find and whether the armrests provide firm hand support during standing.
Tip: A caregiver may stand nearby for safety, but should not pull the senior out of the chair during a fit test.
Check: The senior can operate the chair and complete the sitting and standing sequence without twisting, sliding, or losing balance.
Step 6: Inspect safety, materials, and controls
Check that the frame feels stable and the chair does not rock unexpectedly. Look for reachable controls, a clear emergency stop or reverse action on lift models, protected moving parts, and a weight rating above the user’s current weight. Choose firm, supportive padding that does not collapse deeply. Select upholstery that is breathable, easy to clean, and resistant to sliding when the user changes position.
Tip: Ask whether a power model includes battery backup and how many return-to-upright cycles it can provide during an outage.
Check: The chair feels stable, the controls work predictably, and the materials suit the user’s skin, temperature, and cleaning needs.
Step 7: Confirm delivery, warranty, and return terms
Request the model’s exact assembled dimensions, wall clearance, weight limit, electrical requirements, and warranty details in writing. Ask who repairs the motor, handset, frame, and upholstery, and whether service is available at home. Check return deadlines, restocking charges, pickup fees, and rules for chairs that have been assembled or used. Confirm whether delivery includes placement, assembly, packaging removal, and an operating demonstration.
Tip: Keep the model number, receipt, warranty document, and service contact together.
Check: You know the total delivered cost, return conditions, covered parts, service process, and final dimensions.
Step 8: Position and test the chair at home
Place the chair on a level, stable surface with the manufacturer’s required wall clearance. Keep the front and sides clear of tables, rugs, pets, cords, and walking aids. Plug a power chair directly into a suitable wall outlet unless its instructions permit another arrangement. Run the chair through its full motion while nobody is seated, then repeat with the senior and a helper nearby.
Tip: Do not route a power cord under the chair, across a walkway, or through an area reached by the moving frame.
Check: The chair completes its full movement without striking objects, trapping the cord, rocking, or blocking the walking route.
Common Mistakes to Avoid
- Buying a chair from online dimensions without testing the seated fit. — Use measurements to narrow the options, then have the senior test the exact model or confirm that the return policy allows a realistic home trial.
- Choosing an oversized, very soft chair because it appears more comfortable. — Choose a seat that supports the thighs and back without deep sinking. Excess width and depth can promote leaning, sliding, and difficult standing.
- Selecting a lift recliner without practicing its movement. — Test the full lift cycle several times. The senior should remain balanced, keep both feet placed safely, and understand when to release the control.
- Forgetting the chair’s fully reclined footprint. — Measure from the wall to the farthest point reached by the footrest and leave additional clearance for people, furniture, and walking aids.
Troubleshooting
Problem: The senior’s feet do not reach the floor in the upright position.
Solution: Choose a lower seat or a model with less seat depth. Do not use a loose footstool during standing because it can obstruct the feet or move unexpectedly.
Problem: The chair feels comfortable at first but causes back or neck pain later.
Solution: Recheck lumbar and head support after 15 to 30 minutes. Try a model with adjustable back and head sections. Return the chair within the trial period if the pain continues.
Problem: The power chair stops while reclined.
Solution: Check the wall outlet, plug, transformer connection, and handset cable without reaching beneath moving parts. Use the approved battery backup if fitted. Contact the seller if power is present but movement does not resume.
Problem: The lift function tips the user forward too quickly.
Solution: Release the control before the chair reaches its highest point and practice with a helper. If the user still cannot gain stable footing, stop using the lift and request guidance from an occupational therapist or physiotherapist.
What Success Looks Like
The finished setup fits the senior in both upright and reclined positions. The feet rest securely when sitting and standing, the seat edge does not press behind the knees, and the back and head remain supported. The user can reach the controls, change positions, and leave the chair without twisting or losing balance. The chair moves without hitting furniture, pinching the power cord, or blocking a walkway. Delivery records, operating instructions, warranty details, and service contacts are stored where a caregiver can find them.
Next Steps
Use the chair for short sessions during the first few days and check for new pressure, numbness, swelling, skin irritation, or pain. Recheck its position after cleaning or moving nearby furniture. Inspect the cord, controls, frame, and moving joints each month, following the manufacturer’s maintenance instructions. Arrange professional advice if the senior’s mobility changes, repeated falls occur, or standing becomes harder. Reevaluate the fit after major weight change, surgery, or a new mobility aid.
Frequently Asked Questions
Does every senior with difficulty standing need a lift recliner?
No. A higher fixed seat, firm armrests, physiotherapy, or a different transfer method may be more suitable. A clinician or occupational therapist can advise when weakness, balance problems, joint restrictions, or recent surgery affect the choice.
How firm should an ergonomic recliner be?
The seat should distribute weight without allowing the hips to sink far below the knees. The user should remain stable near the front edge and push from the armrests without fighting deep cushions.
Is a wall-hugger recliner a good choice for a small room?
It can reduce the clearance needed behind the chair, but the footrest still extends into the room. Measure the complete moving footprint and verify that the mechanism does not narrow the walking path.
Can a recliner be used for sleeping every night?
Only use it for regular overnight sleep when a qualified clinician supports that arrangement and the chair provides suitable pressure relief. Recliners may not provide the position changes or pressure distribution offered by an appropriate bed.
Which features matter most when comparing power recliners?
Focus on seat fit, independent back and footrest adjustment, reachable controls, smooth movement, battery backup, weight rating, repair access, and a usable return policy. Extra massage or heating features should not replace good physical support.
Fall Picks
fall essentials
As an affiliate, we earn on qualifying purchases.